13-in-1 Windows Installer & PC Repair Toolkit (Windows 2000–11, WinPE, Password Reset, ERD Tools)
13-in-1 Windows Installer & PC Repair Toolkit (Windows 2000–11, WinPE, Password Reset, ERD Tools)
Bootable Windows Repair & Reinstall USB for fixing PCs that won’t start, recovering files, repairing startup problems, resetting passwords, or reinstalling Windows. This USB runs its own modern WinPE recovery environment so you can troubleshoot or reinstall Windows even when the installed system is damaged or completely non-functional.
13-in-1 Toolkit: Legacy-to-modern Windows installers + WinPE recovery + password reset + ERD/MSDaRT + DriverPack + IT utilities.
Current 64GB edition includes a full legacy-to-modern installer collection: Windows 2000, Windows XP, Windows Vista, Windows 7 (32-bit & 64-bit), Windows 8, Windows 8.1, Windows 10 (64-bit), and Windows 11 (64-bit amd64 & 64-bit arm64), plus advanced repair and recovery tools.
🧰 What You Can Do
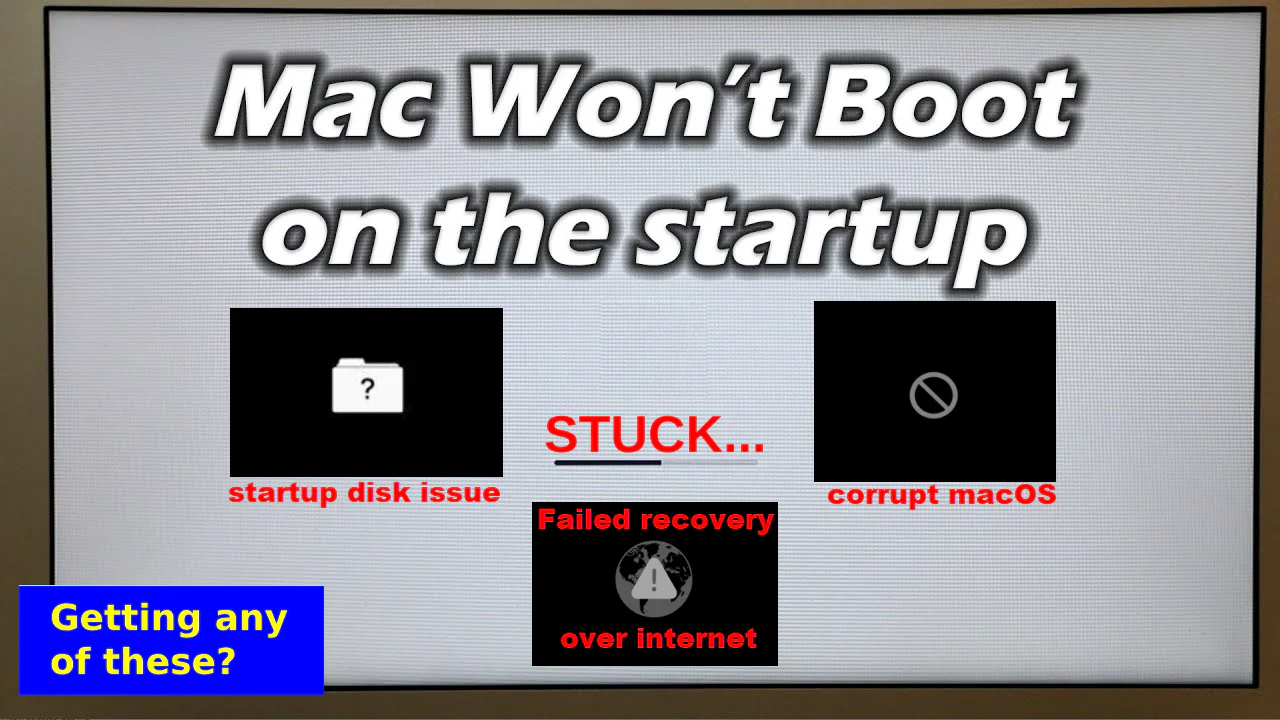
- Repair Windows boot issues (startup loops, missing boot files, corrupted system files).
- Recover files from non-booting systems.
- Use System Restore, Command Prompt, and advanced diagnostics.
- Reinstall Windows using included installers.
- Repair driver or update issues preventing Windows from starting.
- Access internal drives even when Windows is unresponsive.
📦 What's Included
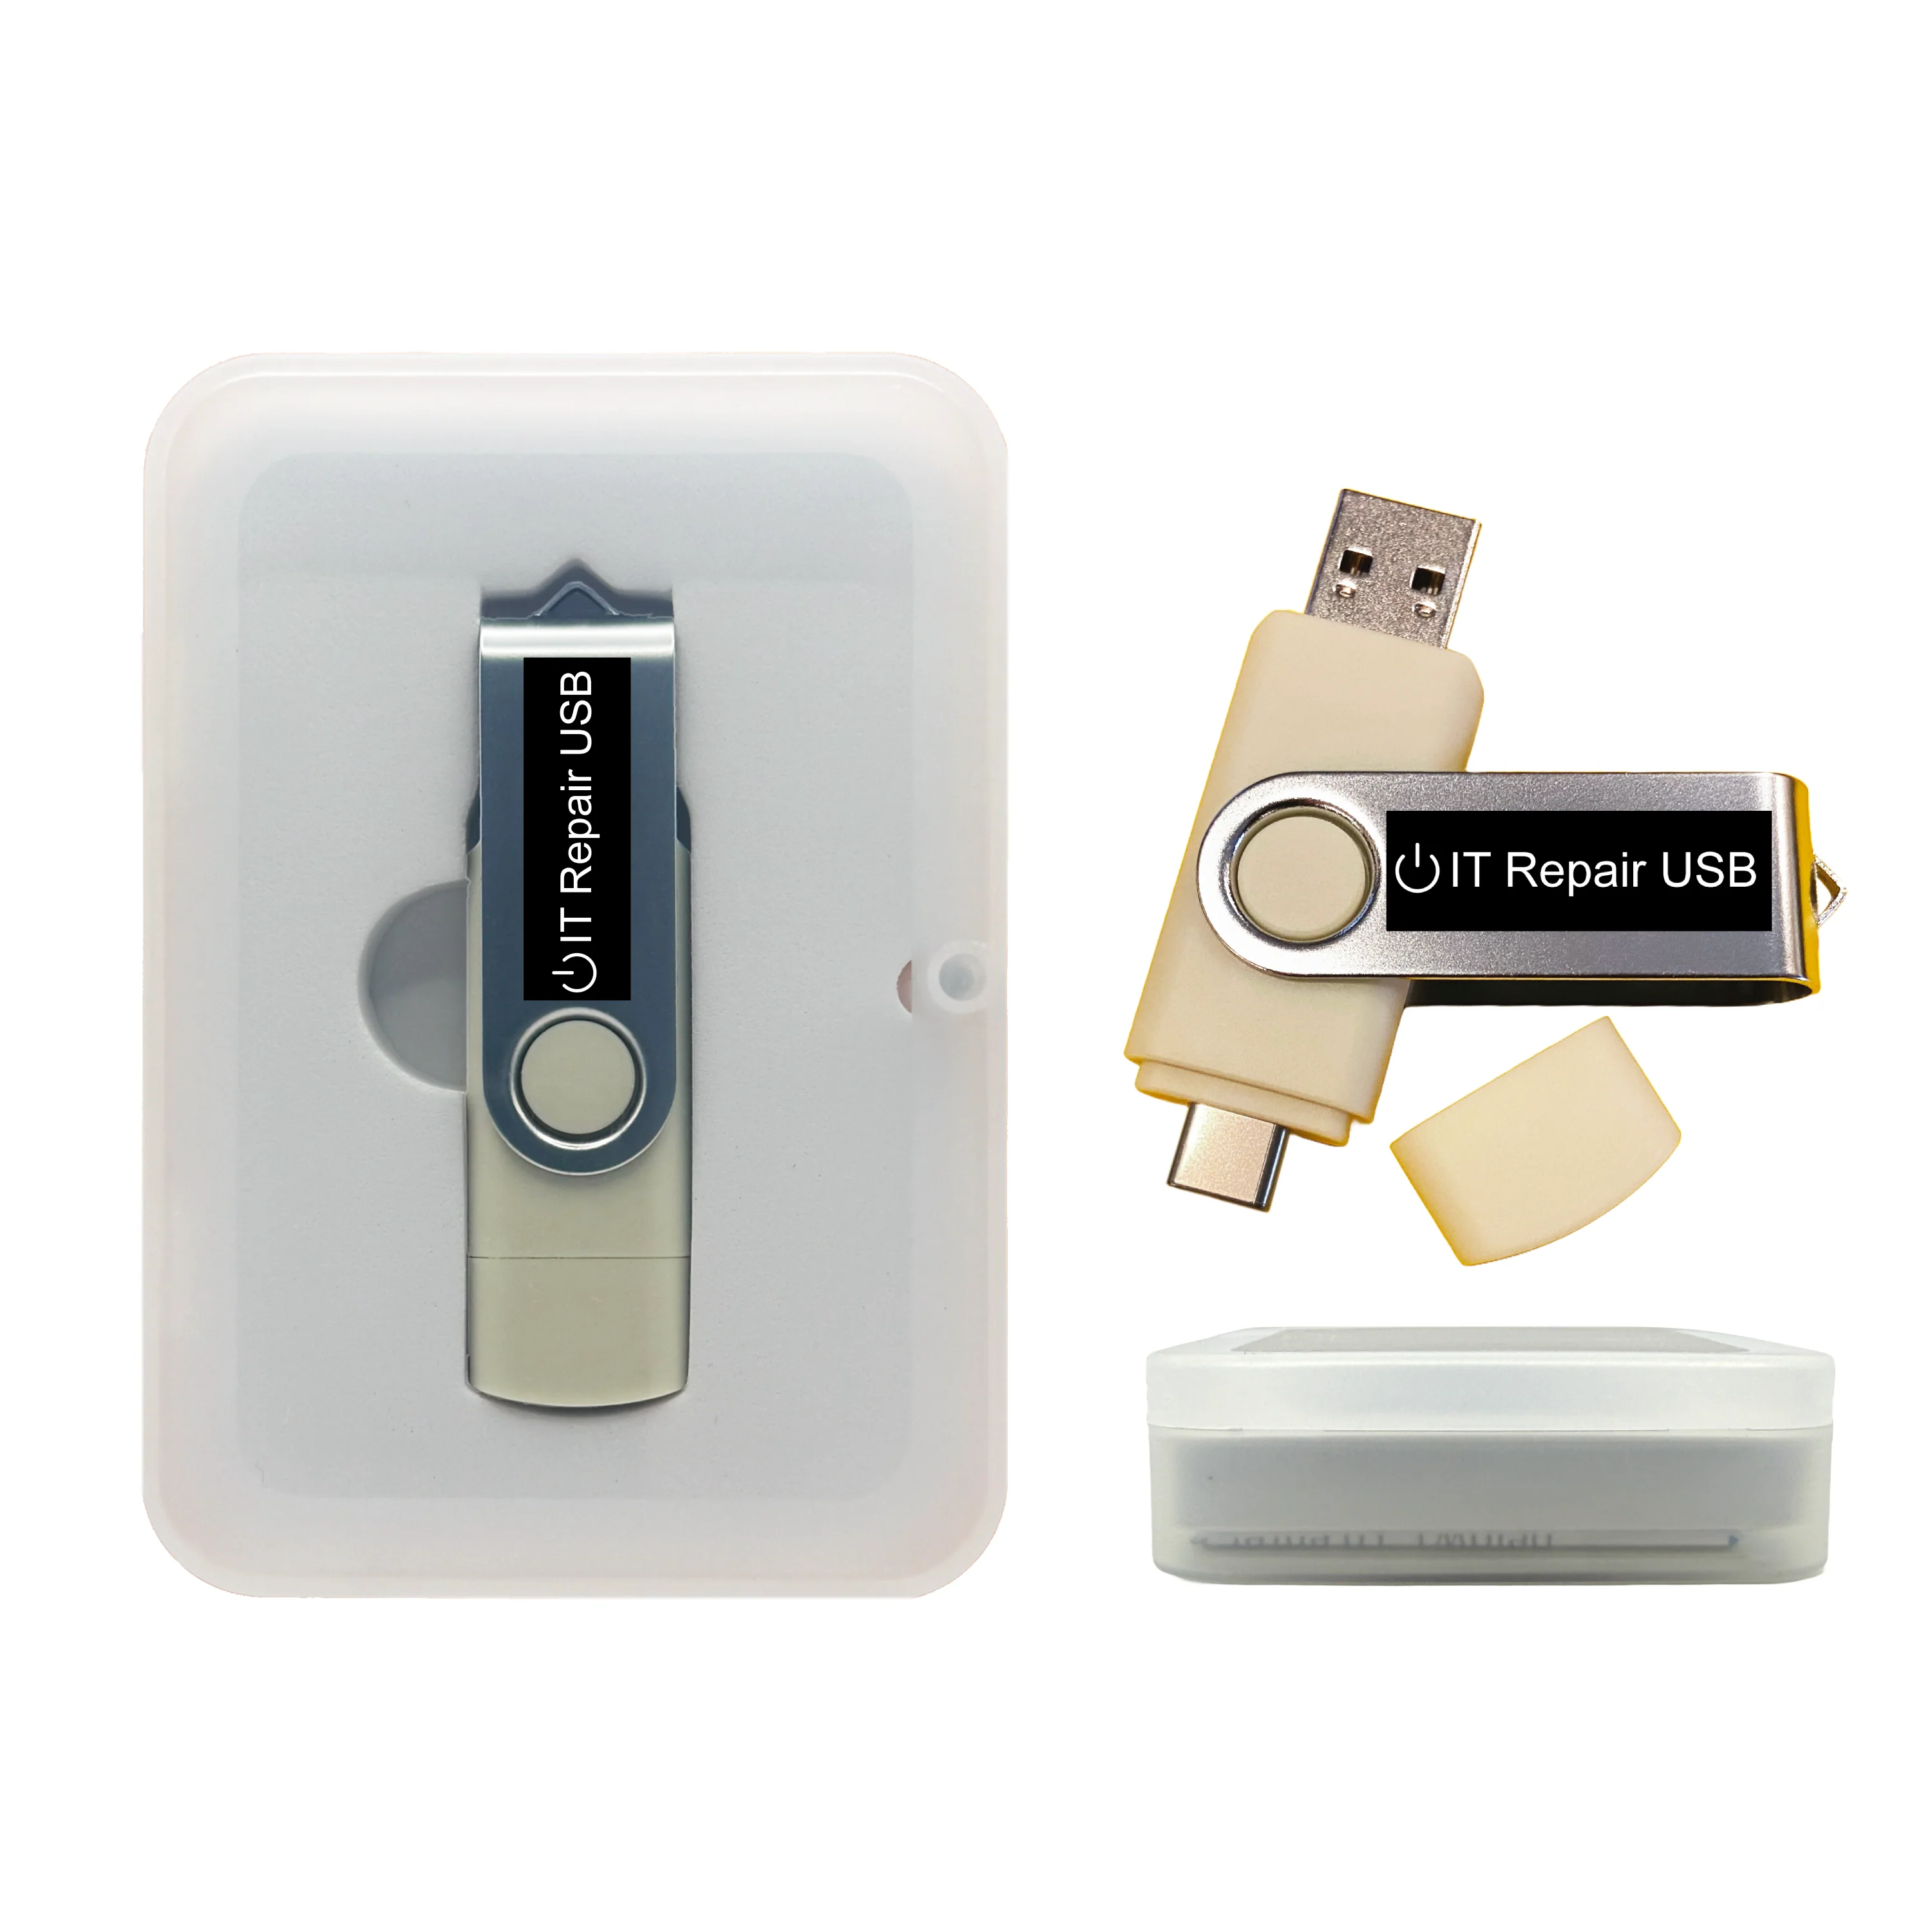
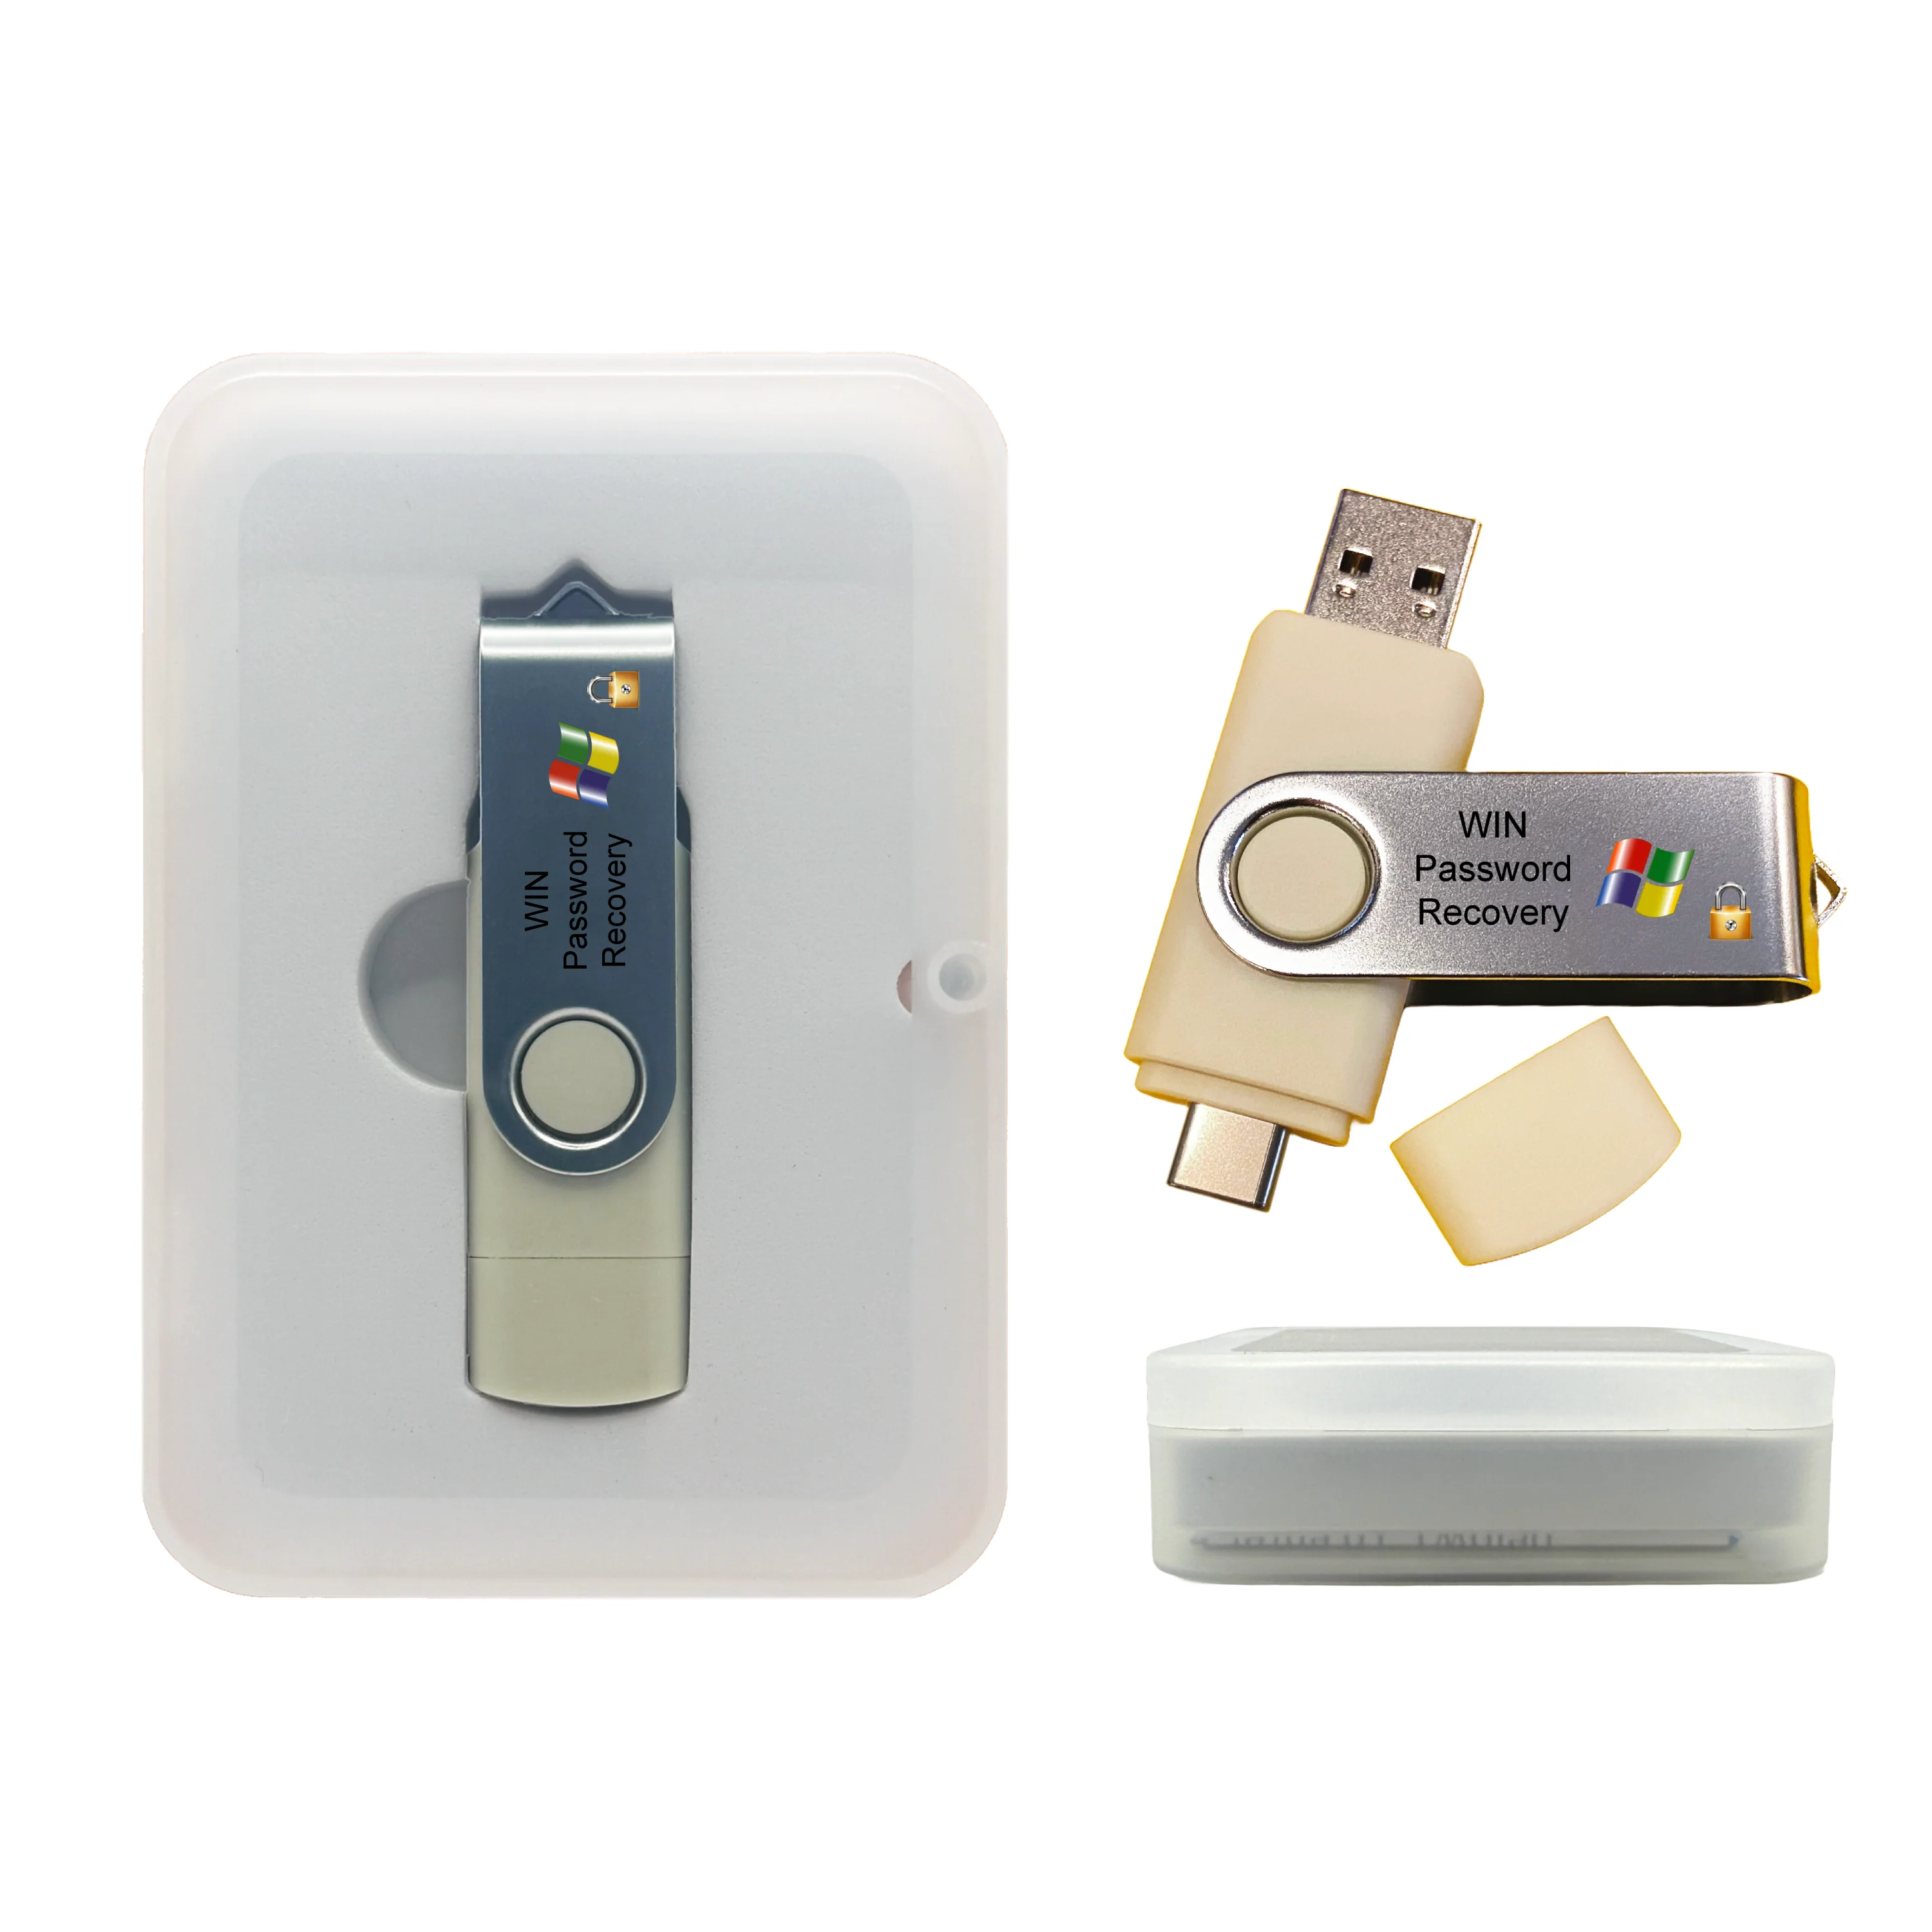
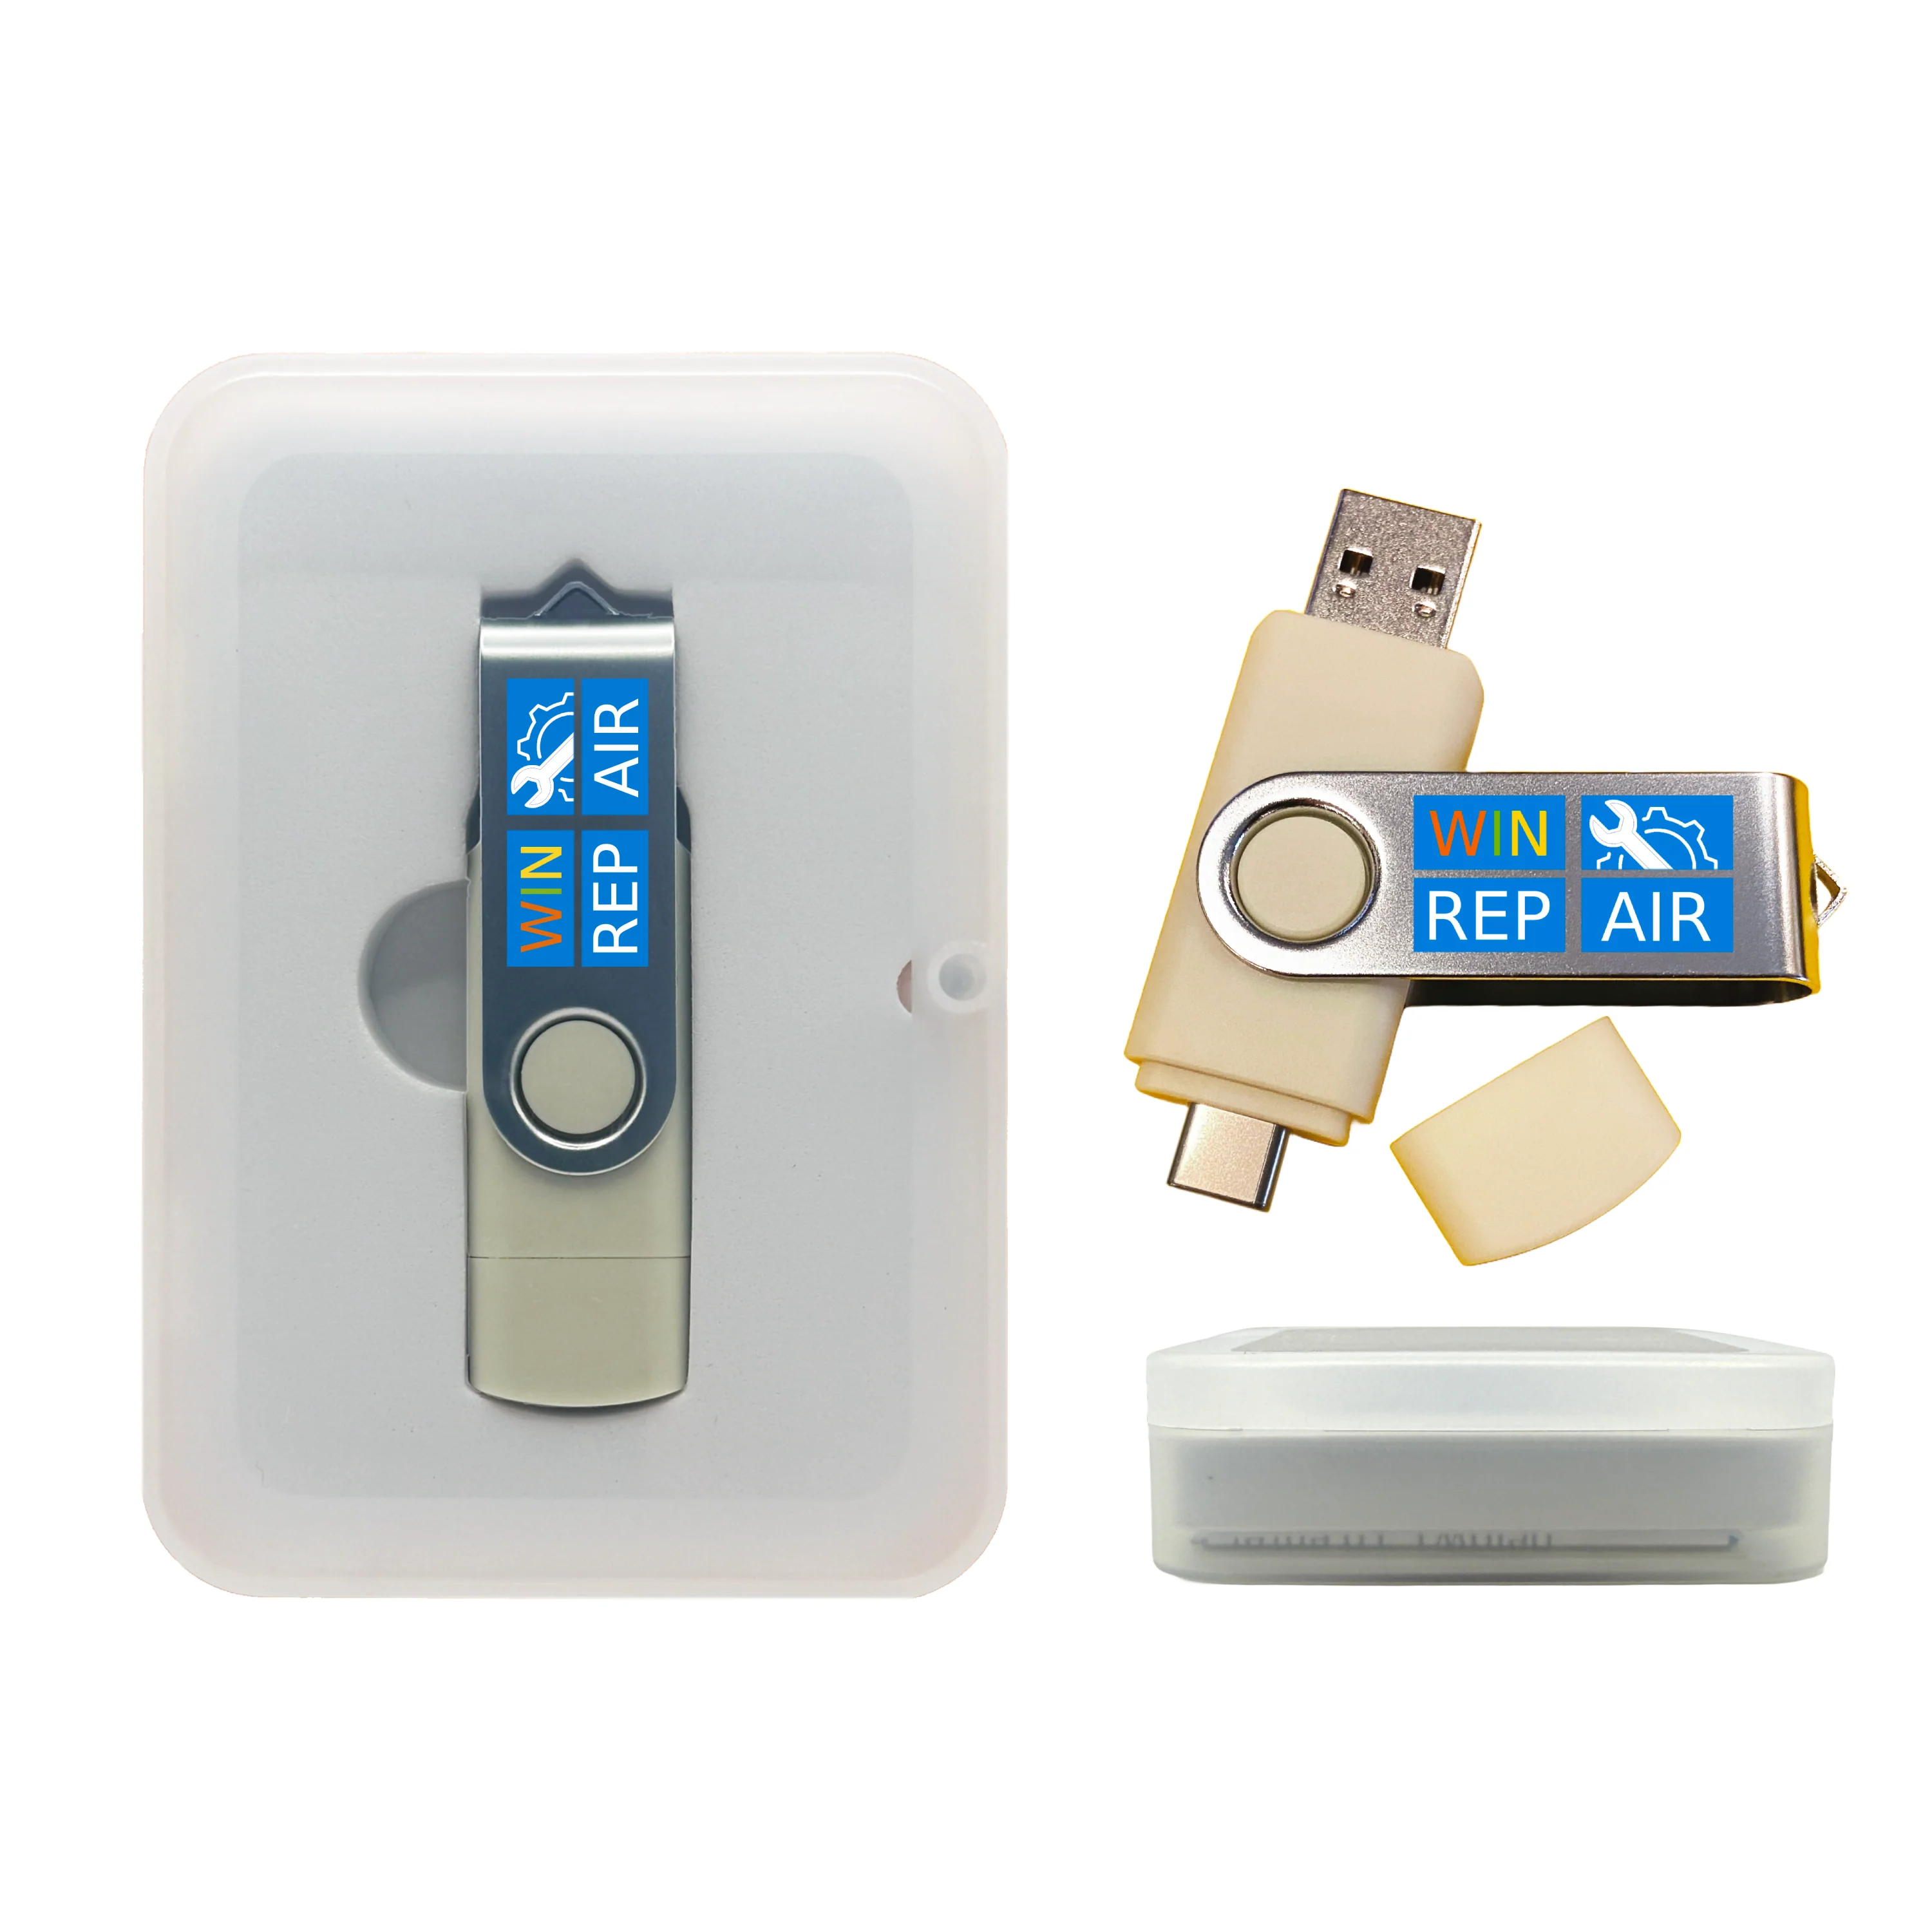
- 64GB Bootable Windows Repair & Installer USB with legacy and modern Windows versions.
- Dual USB-A / USB-C connector flash drive (USB 2.x compatible, works in USB 3.x ports).
-
Included Windows Installers:
- Windows 2000 — legacy systems & industrial PCs
- Windows XP — legacy & compatibility installs
- Windows Vista
- Windows 7 — 32-bit (x86) and 64-bit (amd64)
- Windows 8 (The famous Live Tiles Windows!)
- Windows 8.1
- Windows 10 — 64-bit (amd64)
- Windows 11 — 64-bit (amd64) and 64-bit (arm64)
- Modern WinPE Recovery Environment (Windows 10 / 11 PE based).
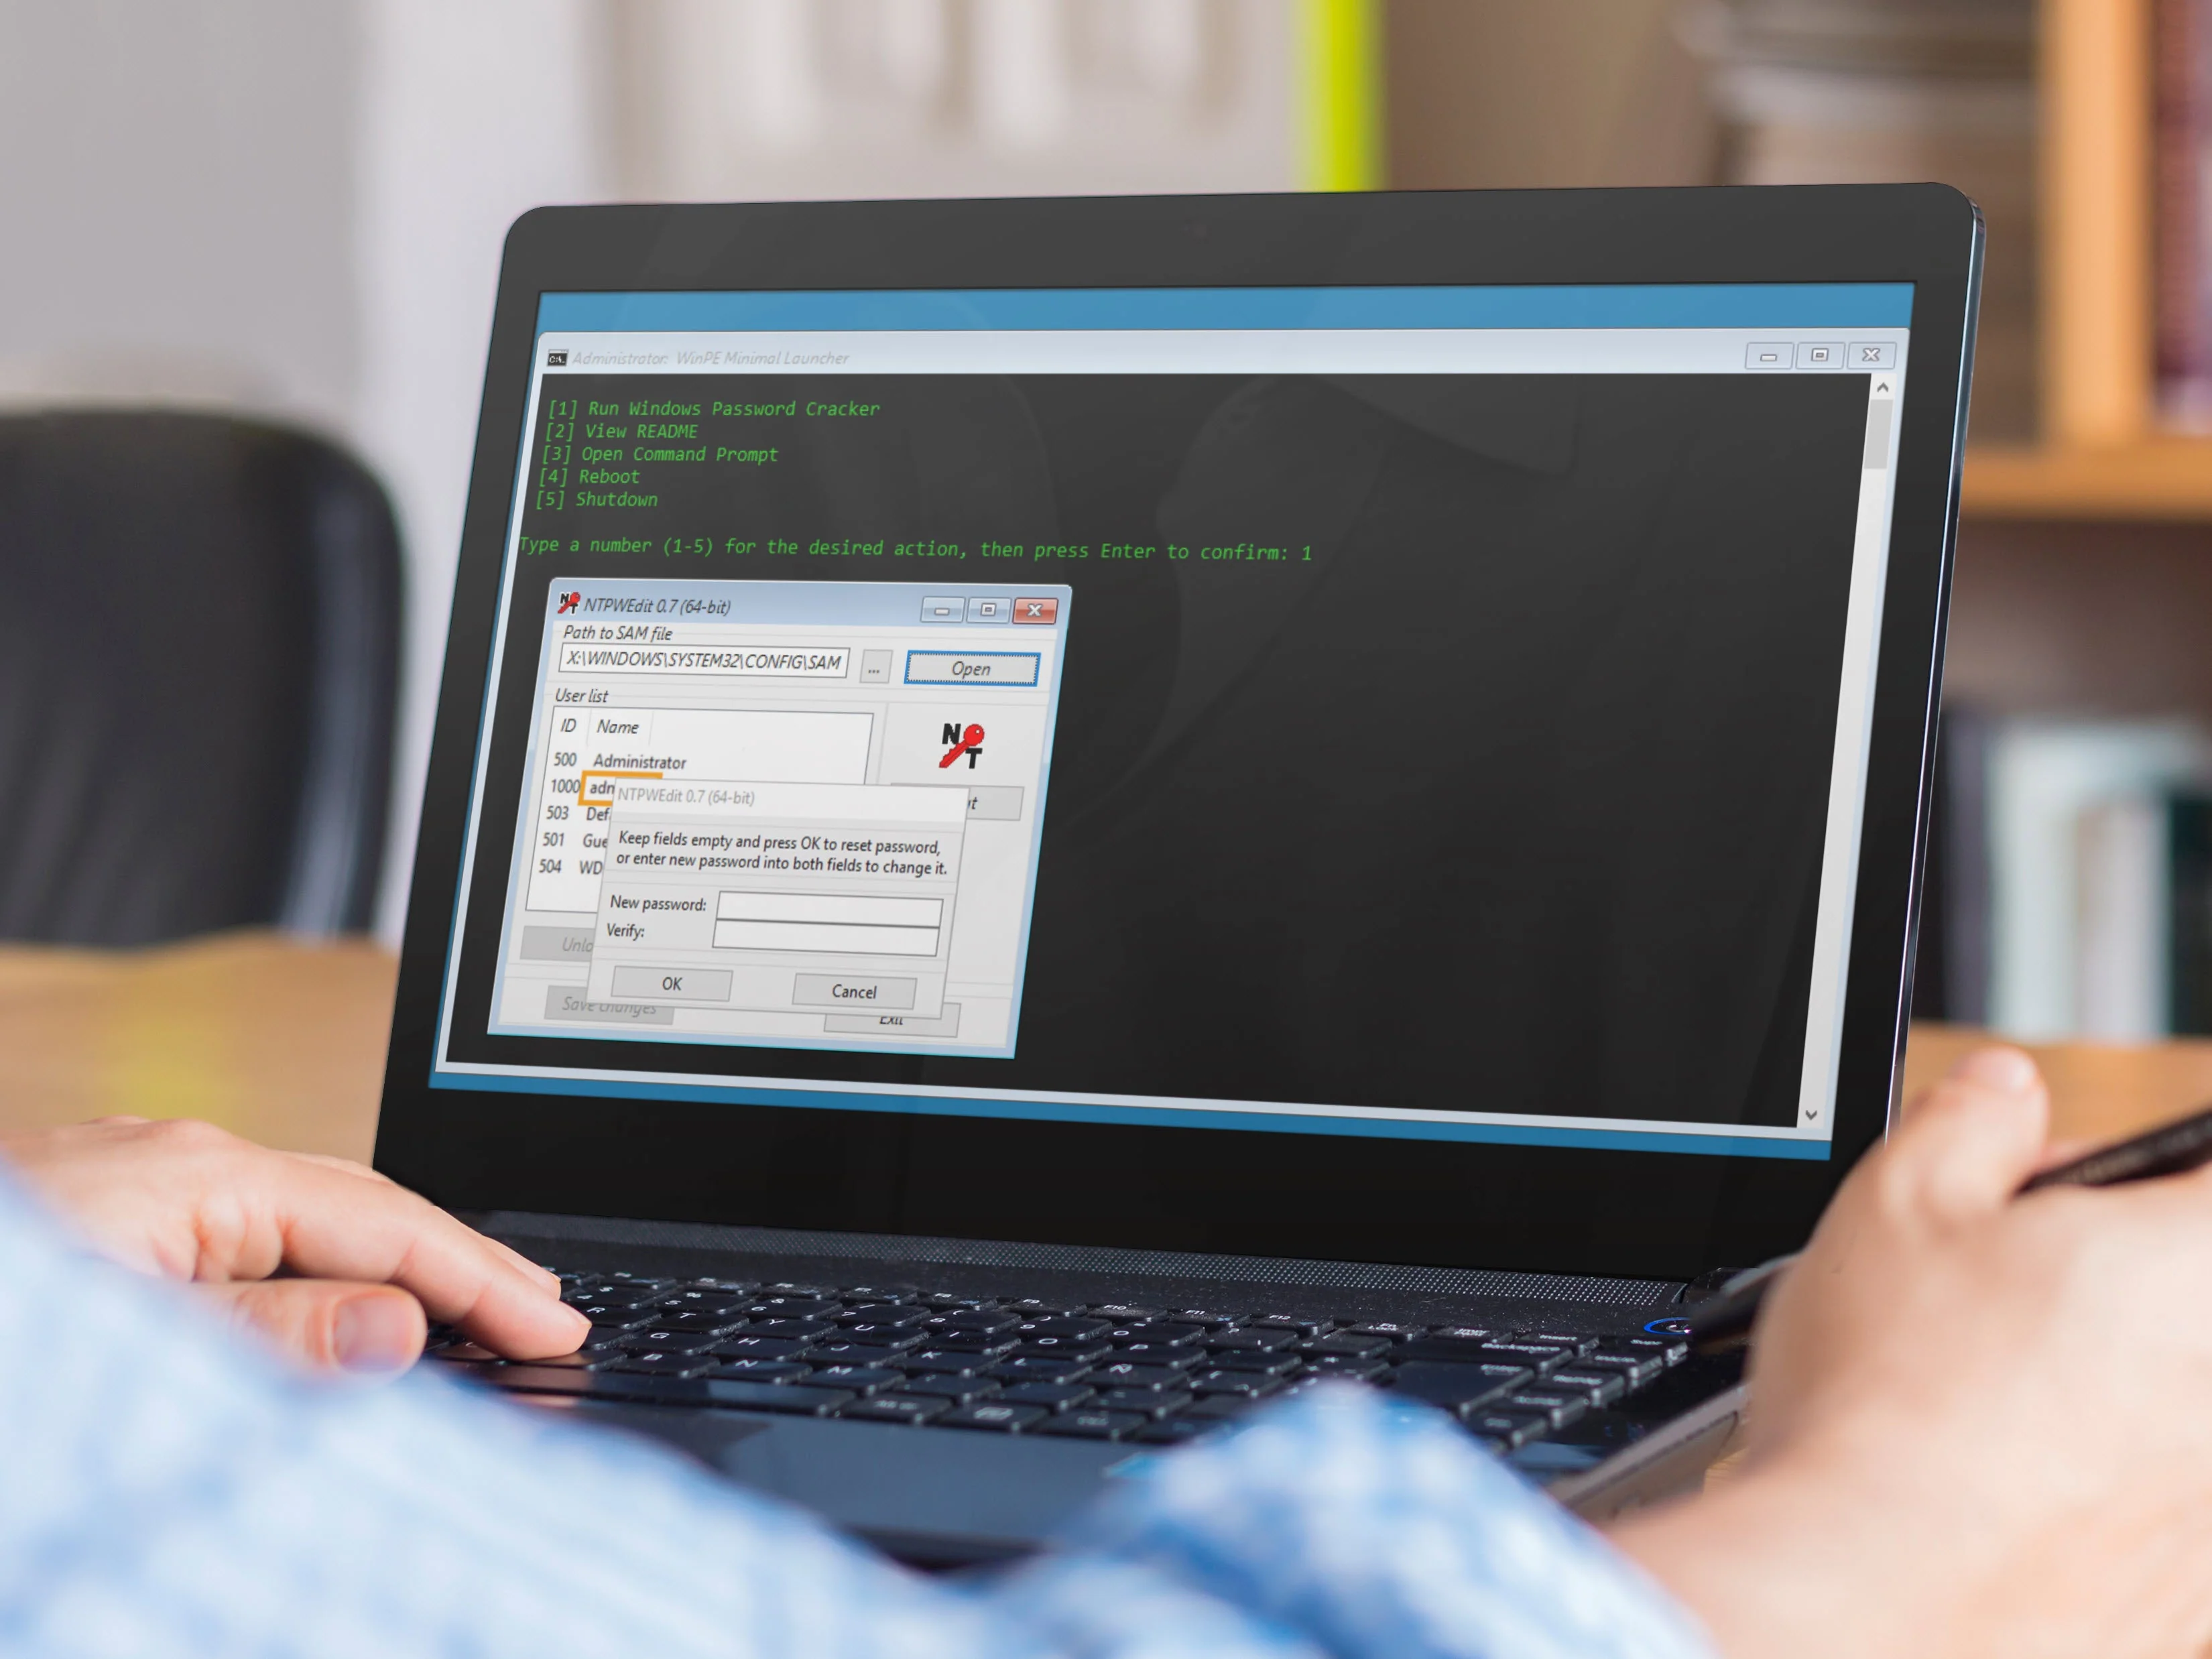
- Password Reset Utility (offline local account reset).
- ERD Commander / MSDaRT Legacy Windows Tools for Windows XP / 2000 / Vista / 7 recovery.
- DriverPack Utilities for fast post-install driver detection.
- IT Utilities App Pack (disk tools, diagnostics, partitioning, file recovery, system utilities).
- Basic boot keys & tips included.
💻 Compatibility & Requirements
- Legacy Windows (2000 / XP / Vista): Require Legacy BIOS or UEFI-CSM support and MBR partitioning.
- Windows 7: Older Intel/AMD PCs with Legacy BIOS or UEFI-CSM support.
- Windows 8 / 8.1 / 10 (64-bit): Most Intel/AMD systems.
-
Windows 11:
- 64-bit amd64: Modern Intel/AMD PCs meeting Win11 hardware requirements.
- 64-bit arm64: Supported ARM-based PCs capable of USB boot.
- Ports: USB 2.0 or 3.x; keyboard & mouse recommended.
- Storage: Clean install requires free internal drive space.
- Not for ARM Macs (M1/M2/M3) or ARM devices with locked bootloaders.
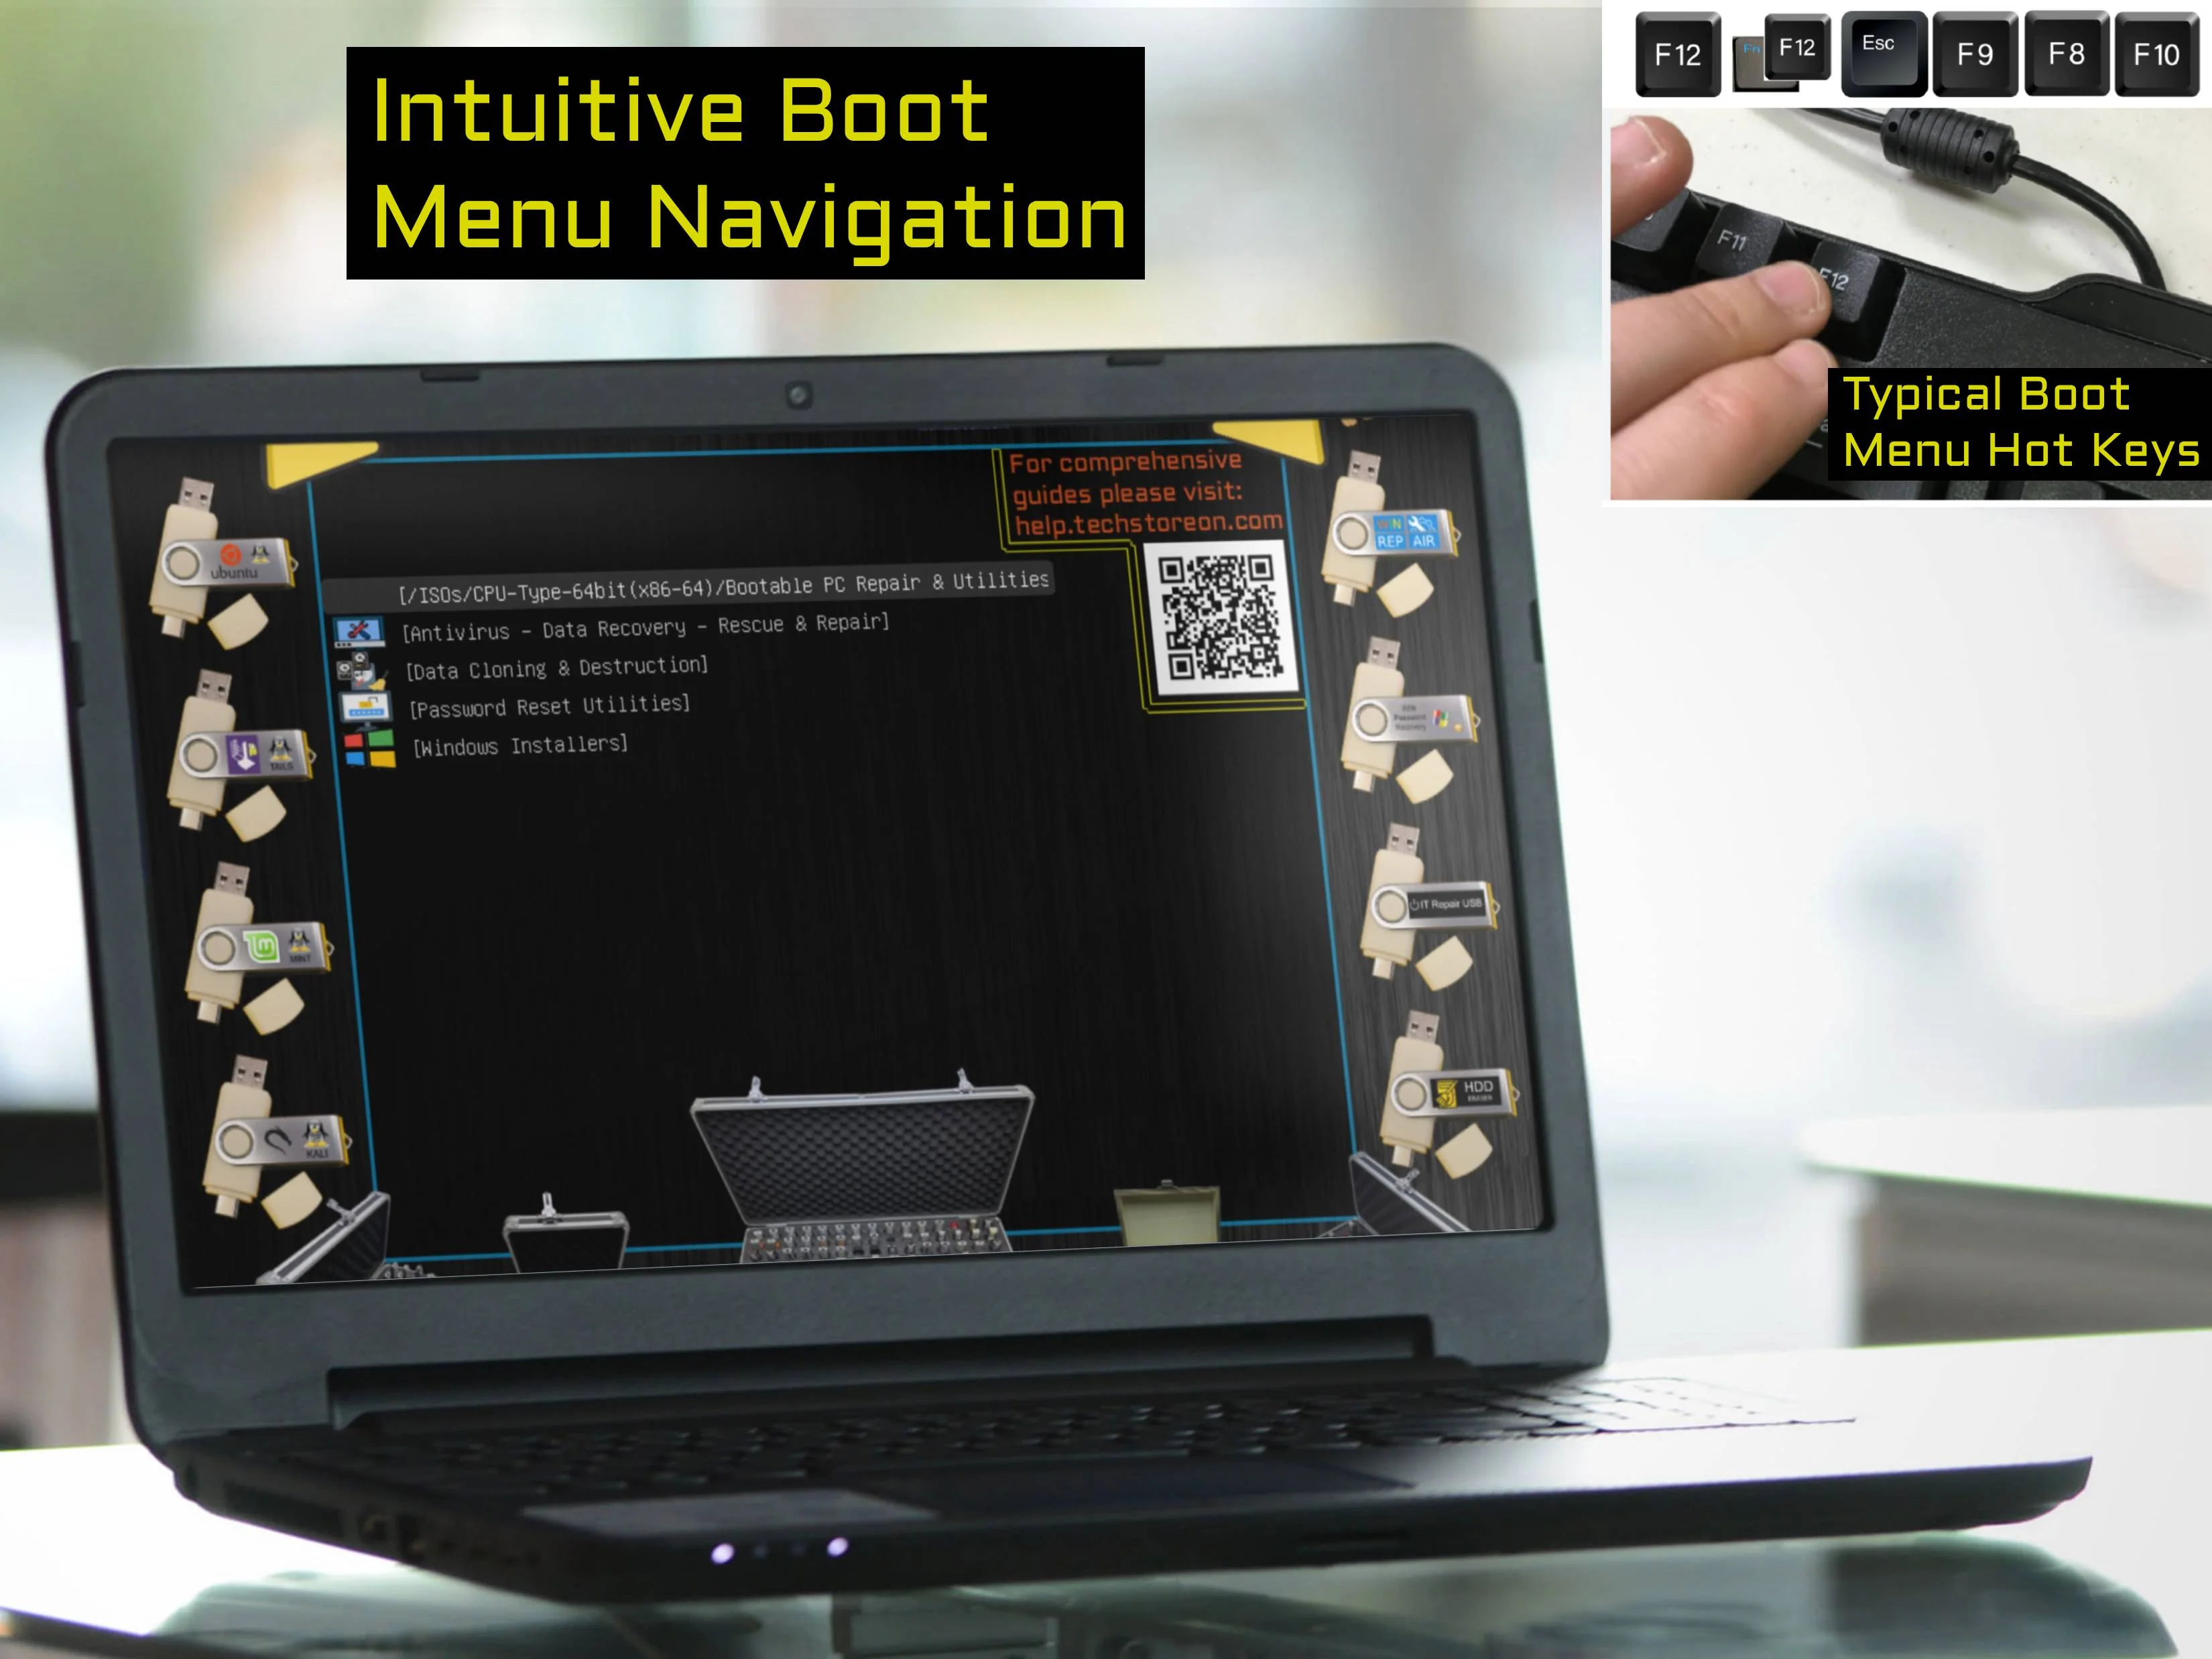
⚙️ How to Boot
Insert USB, power on, press your boot-menu key (F12, Esc, F10, F2, Del, etc.).
Select the USB device → choose your Windows version → launch repair tools or the installer.
Can repair an existing install or perform a clean reinstall.
Help & Tutorials:
help.techstoreon.com
— USB booting guides, troubleshooting, and boot-key charts.
Installing older Windows versions?
If you plan to install Windows XP or Windows 2000, see our step-by-step WinPE guide:
How to Install Windows XP / Windows 2000 from WINREPUSB →
♻️ Give Your Old PC a Second Life
Reinstalling Windows can dramatically speed up older PCs that slowed down over time or accumulated years of system clutter.
Why This Matters
- Revives older computers instead of replacing them.
- Improves performance on sluggish systems.
- Reduces electronic waste and saves money.
How This USB Helps
- Perform a clean reinstall to refresh slow or unstable PCs.
- Fix systems broken by updates, malware, or corruption.
- Restore a PC to “like-new” performance.
🔧 Customizable USB (Optional)
This USB may be customizable within technical and licensing limits. Possible additions include:
- Additional open-source recovery tools.
- Linux-based rescue utilities.
More details here:
https://www.techstoreon.com/pages/customize
Some installer components cannot be modified due to Microsoft licensing restrictions.
🧩 Windows installer can’t see your SSD (Intel RST / VMD) — Fix
What this means: Your PC boots from USB correctly, but some newer laptops (HP/Dell/Lenovo/ASUS) use Intel RST / VMD. During Windows install/recovery, Windows Setup may require a storage driver before it can detect the internal SSD/NVMe drive.
Common symptoms
- Windows installer loads files then returns back to the menu
- Custom install shows No drives found or asks for a driver
- Repair Command Prompt opens at X:\ (USB environment)
Step 1 — Quick BIOS check (recommended)
- Enter BIOS (HP often F10; boot menu often F9).
- Set Boot Mode: UEFI and (if needed) Disable Secure Boot temporarily.
- If you see Intel Optane / RST / VMD / RAID, disable it or switch to AHCI (if available), then reboot.
Note: Some models do not allow disabling RST/VMD — that’s normal. Use the driver method below.
Step 2 — Download the correct storage driver for your exact PC model
- HP: https://support.hp.com/us-en/drivers
- Dell: https://www.dell.com/support
- Lenovo: https://support.lenovo.com
- ASUS: https://www.asus.com/support
On your manufacturer’s support page, enter your model, select your Windows version, then look under Storage for:
Intel Rapid Storage Technology (RST) or Intel VMD driver.
Tip: If you don’t see the storage driver for the newest OS option, try selecting an older Windows 10 option on the driver page.
Step 3 — Save the driver on the SAME USB
- Download the driver and extract it (don’t leave it as a single .exe/.zip only).
- Copy the extracted driver folder to your TechStoreOn USB.
- Recommended location: place it at the root level of the USB for easy browsing.
- You can also place it inside
PC Drivers Apps & Utilities\\DriverPack, but root level is easiest.
Step 4 — Load the driver during Windows Setup
- Boot the USB and start Windows Setup (Install / Repair flow).
- Choose Custom install (or proceed until you see the drive list / driver prompt).
- Click Load Driver → Browse → select the driver folder you copied on the USB.
- Click Next. Your internal SSD/NVMe drive should appear within seconds.
Need help? Message us with your PC brand + model and a photo of the “Load Driver” screen and we’ll point you to the exact driver and folder.
🛠️ Support
Need help or have questions? Message Us.
⚠️ Licensing & Legal Use
Windows installation requires a valid product key depending on your system. This USB provides installers and repair tools; activation is handled through Microsoft’s licensing system.
Original: $29.99
-70%$29.99
$9.00Product Information
Product Information
Shipping & Returns
Shipping & Returns
Description
Bootable Windows Repair & Reinstall USB for fixing PCs that won’t start, recovering files, repairing startup problems, resetting passwords, or reinstalling Windows. This USB runs its own modern WinPE recovery environment so you can troubleshoot or reinstall Windows even when the installed system is damaged or completely non-functional.
13-in-1 Toolkit: Legacy-to-modern Windows installers + WinPE recovery + password reset + ERD/MSDaRT + DriverPack + IT utilities.
Current 64GB edition includes a full legacy-to-modern installer collection: Windows 2000, Windows XP, Windows Vista, Windows 7 (32-bit & 64-bit), Windows 8, Windows 8.1, Windows 10 (64-bit), and Windows 11 (64-bit amd64 & 64-bit arm64), plus advanced repair and recovery tools.
🧰 What You Can Do
- Repair Windows boot issues (startup loops, missing boot files, corrupted system files).
- Recover files from non-booting systems.
- Use System Restore, Command Prompt, and advanced diagnostics.
- Reinstall Windows using included installers.
- Repair driver or update issues preventing Windows from starting.
- Access internal drives even when Windows is unresponsive.
📦 What's Included
- 64GB Bootable Windows Repair & Installer USB with legacy and modern Windows versions.
- Dual USB-A / USB-C connector flash drive (USB 2.x compatible, works in USB 3.x ports).
-
Included Windows Installers:
- Windows 2000 — legacy systems & industrial PCs
- Windows XP — legacy & compatibility installs
- Windows Vista
- Windows 7 — 32-bit (x86) and 64-bit (amd64)
- Windows 8 (The famous Live Tiles Windows!)
- Windows 8.1
- Windows 10 — 64-bit (amd64)
- Windows 11 — 64-bit (amd64) and 64-bit (arm64)
- Modern WinPE Recovery Environment (Windows 10 / 11 PE based).
- Password Reset Utility (offline local account reset).
- ERD Commander / MSDaRT Legacy Windows Tools for Windows XP / 2000 / Vista / 7 recovery.
- DriverPack Utilities for fast post-install driver detection.
- IT Utilities App Pack (disk tools, diagnostics, partitioning, file recovery, system utilities).
- Basic boot keys & tips included.
💻 Compatibility & Requirements
- Legacy Windows (2000 / XP / Vista): Require Legacy BIOS or UEFI-CSM support and MBR partitioning.
- Windows 7: Older Intel/AMD PCs with Legacy BIOS or UEFI-CSM support.
- Windows 8 / 8.1 / 10 (64-bit): Most Intel/AMD systems.
-
Windows 11:
- 64-bit amd64: Modern Intel/AMD PCs meeting Win11 hardware requirements.
- 64-bit arm64: Supported ARM-based PCs capable of USB boot.
- Ports: USB 2.0 or 3.x; keyboard & mouse recommended.
- Storage: Clean install requires free internal drive space.
- Not for ARM Macs (M1/M2/M3) or ARM devices with locked bootloaders.
⚙️ How to Boot
Insert USB, power on, press your boot-menu key (F12, Esc, F10, F2, Del, etc.).
Select the USB device → choose your Windows version → launch repair tools or the installer.
Can repair an existing install or perform a clean reinstall.
Help & Tutorials:
help.techstoreon.com
— USB booting guides, troubleshooting, and boot-key charts.
Installing older Windows versions?
If you plan to install Windows XP or Windows 2000, see our step-by-step WinPE guide:
How to Install Windows XP / Windows 2000 from WINREPUSB →
♻️ Give Your Old PC a Second Life
Reinstalling Windows can dramatically speed up older PCs that slowed down over time or accumulated years of system clutter.
Why This Matters
- Revives older computers instead of replacing them.
- Improves performance on sluggish systems.
- Reduces electronic waste and saves money.
How This USB Helps
- Perform a clean reinstall to refresh slow or unstable PCs.
- Fix systems broken by updates, malware, or corruption.
- Restore a PC to “like-new” performance.
🔧 Customizable USB (Optional)
This USB may be customizable within technical and licensing limits. Possible additions include:
- Additional open-source recovery tools.
- Linux-based rescue utilities.
More details here:
https://www.techstoreon.com/pages/customize
Some installer components cannot be modified due to Microsoft licensing restrictions.
🧩 Windows installer can’t see your SSD (Intel RST / VMD) — Fix
What this means: Your PC boots from USB correctly, but some newer laptops (HP/Dell/Lenovo/ASUS) use Intel RST / VMD. During Windows install/recovery, Windows Setup may require a storage driver before it can detect the internal SSD/NVMe drive.
Common symptoms
- Windows installer loads files then returns back to the menu
- Custom install shows No drives found or asks for a driver
- Repair Command Prompt opens at X:\ (USB environment)
Step 1 — Quick BIOS check (recommended)
- Enter BIOS (HP often F10; boot menu often F9).
- Set Boot Mode: UEFI and (if needed) Disable Secure Boot temporarily.
- If you see Intel Optane / RST / VMD / RAID, disable it or switch to AHCI (if available), then reboot.
Note: Some models do not allow disabling RST/VMD — that’s normal. Use the driver method below.
Step 2 — Download the correct storage driver for your exact PC model
- HP: https://support.hp.com/us-en/drivers
- Dell: https://www.dell.com/support
- Lenovo: https://support.lenovo.com
- ASUS: https://www.asus.com/support
On your manufacturer’s support page, enter your model, select your Windows version, then look under Storage for:
Intel Rapid Storage Technology (RST) or Intel VMD driver.
Tip: If you don’t see the storage driver for the newest OS option, try selecting an older Windows 10 option on the driver page.
Step 3 — Save the driver on the SAME USB
- Download the driver and extract it (don’t leave it as a single .exe/.zip only).
- Copy the extracted driver folder to your TechStoreOn USB.
- Recommended location: place it at the root level of the USB for easy browsing.
- You can also place it inside
PC Drivers Apps & Utilities\\DriverPack, but root level is easiest.
Step 4 — Load the driver during Windows Setup
- Boot the USB and start Windows Setup (Install / Repair flow).
- Choose Custom install (or proceed until you see the drive list / driver prompt).
- Click Load Driver → Browse → select the driver folder you copied on the USB.
- Click Next. Your internal SSD/NVMe drive should appear within seconds.
Need help? Message us with your PC brand + model and a photo of the “Load Driver” screen and we’ll point you to the exact driver and folder.
🛠️ Support
Need help or have questions? Message Us.
⚠️ Licensing & Legal Use
Windows installation requires a valid product key depending on your system. This USB provides installers and repair tools; activation is handled through Microsoft’s licensing system.